
Walk in a “forest”: good hunt!
This post talks about 2d maps created in Tiled, and how we implemented walls and
Y-order. You may think about it as Z-order, but as our maps are flat, we only need to arrange things by their Y coordinate.
How do I know which tile in Tiled is passable, and which is not?
Especially that we have such a luxury as thin walls.
My answer is Tiled feature – Terrains (https://doc.mapeditor.org/en/stable/manual/terrain/),
AKA Wang tiles (a good article for gamedevs: https://dev.to/joestrout/wang-2-corner-tiles-544k).
If a side of a tile has a terrain named “wall”, it’s not passable – as simple as that.
This way, our level designers don’t have to mark up the map – the walls are already in the tileset.
So, our objects (and object layers in Tiled) do have Y coordinate, so we know in what order
to draw them.
But what about tiles on a map?
What if our maps have multiple complex layers, maybe even a tree of layers?
What if these layers have similar objects with different Y coordinates, like multiple trees
or pillars or whatever?
Shall the level designer split each object into a separate layer and assign it a Y-order property?
This sounds like too much manual work, prone to error.
Our answer is – automatically split layers into “island” segments, and internally set
each segment’s Y-order according to the lowest tile (with the highest Y).
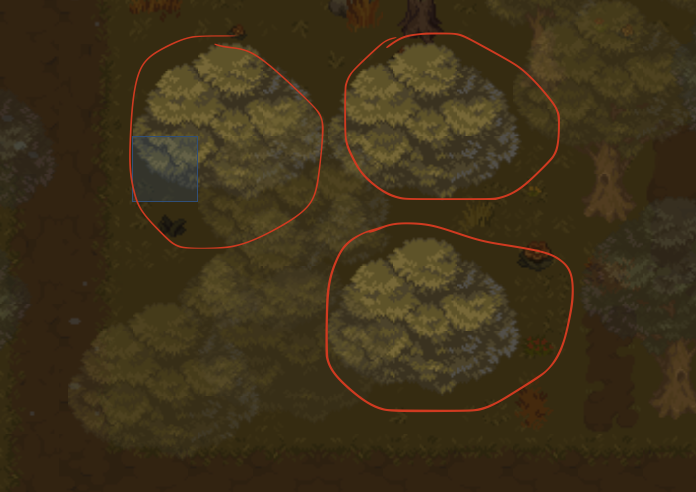
3 segments for 3 trees on a single layer, with a different Y-order
The next step is to only assign Y-order to segments based on the walls
assigned to tiles of that segment. The engine reasonably assumes that
a wall is on a floor level, and everything above it is fluff – tree top,
wall bottom, and so on.
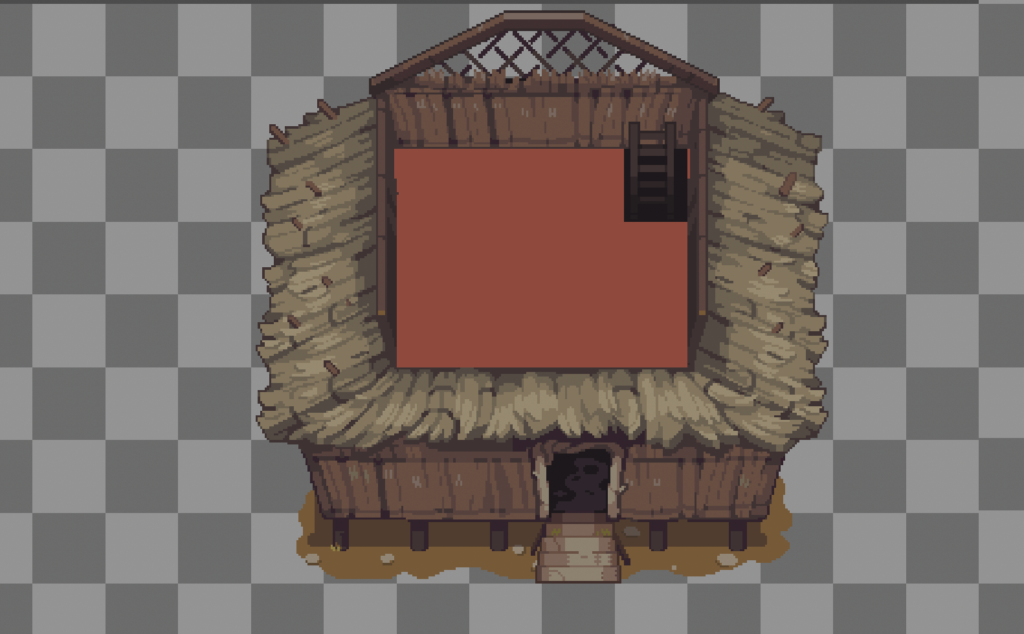
Think of a door mat:

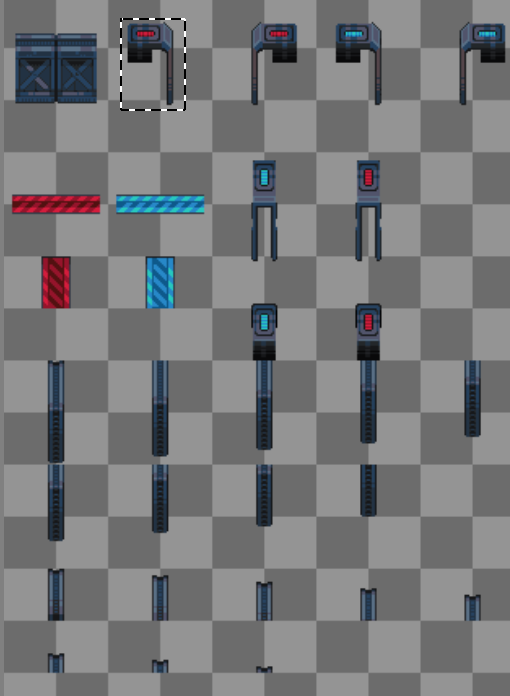
This is more precise, because sometimes our wall tiles have tiles
both above and below them.
Made from this spritesheet:
{
    "name": "Vertical door, 2-tile",
    "door": {
        "walls": [
            {"offset": [-1, 0], "wall": "east"},
            {"offset": [-1, 1], "wall": "east"}
        ]
    },
    "multitile": {
        "tileset": "ArthurVista-dors-4export-v1.0",
        "static_tiles": [
            {
                "name": "opened",
                "fragments": [
                    {"offset": [-1,-1], "id": 34},
                    {"offset": [0,-1], "id": 35},
                    {"offset": [-1,0], "id": 44},
                    {"offset": [0,0], "id": 45},
                    {"offset": [-1,0], "id": 96},
                    {"offset": [0,0], "id": 97},
                    {"offset": [-1,1], "id": 54},
                    {"offset": [0,1], "id": 55},
                    {"offset": [-1,2], "id": 64},
                    {"offset": [0,2], "id": 65}
                ]
            },
            {
                "name": "closed",
                "fragments": [
                    {"offset": [-1,-1], "id": 34},
                    {"offset": [0,-1], "id": 35},
                    {"offset": [-1,0], "id": 44},
                    {"offset": [0,0], "id": 45},
                    {"offset": [-1,0], "id": 70},
                    {"offset": [0,0], "id": 71},
                    {"offset": [-1,1], "id": 54},
                    {"offset": [0,1], "id": 55},
                    {"offset": [-1,2], "id": 64},
                    {"offset": [0,2], "id": 65},
                    {"offset": [-1,1], "id": 74},
                    {"offset": [0,1], "id": 75}
                ]
            }

        ],
        "animations": [
            {
                "name": "open",
                "fragments": [
                    {"offset": [-1,0], "name": "door-v-open-upper-nw"},
                    {"offset": [0,0], "name": "door-v-open-upper-ne"},
                    {"offset": [-1,1], "name": "door-v-open-upper-sw"},
                    {"offset": [0,1], "name": "door-v-open-upper-se"},
                    {"offset": [-1,1], "name": "door-v-open-lower-w"},
                    {"offset": [0,1], "name": "door-v-open-lower-e"}
                ]
            },
            {
                "name": "close",
                "fragments": [
                    {"offset": [-1,0], "name": "door-v-close-upper-nw"},
                    {"offset": [0,0], "name": "door-v-close-upper-ne"},
                    {"offset": [-1,1], "name": "door-v-close-upper-sw"},
                    {"offset": [0,1], "name": "door-v-close-upper-se"},
                    {"offset": [-1,1], "name": "door-v-close-lower-w"},
                    {"offset": [0,1], "name": "door-v-close-lower-e"}
                ]
            }
        ]
    }
}My programming language of choice, Rust, allows you to write code in independent libraries of modules, called “crates”. Other languages do it too, it’s nothing new, but in Rust it’s seriously easier, and the benefits are immediately usable.
This has this effect on our progress: a programmer can work on independent crate for months, without a visible effect on the main project. It happened when we worked on crates for:
Now I can declare that Thin Walls are officially ready for beta testing.
Wait, what Thin Walls?
In short, this is one of my bad decisions that prolong development for months and lead to overengineering. It is a gimmick – I wanted to have not only traditional roguelike full-tile walls, but also walls between tiles.
This broke a cascade of things:
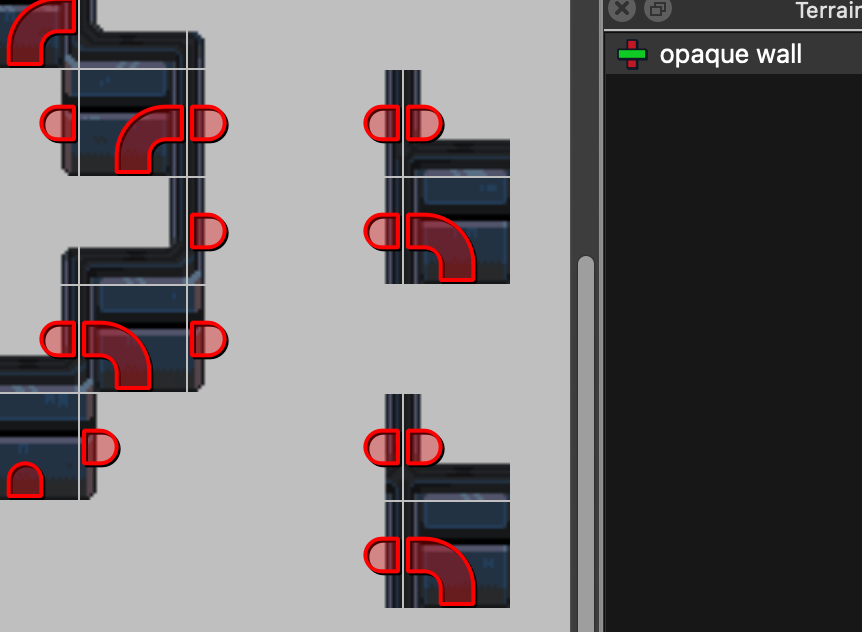
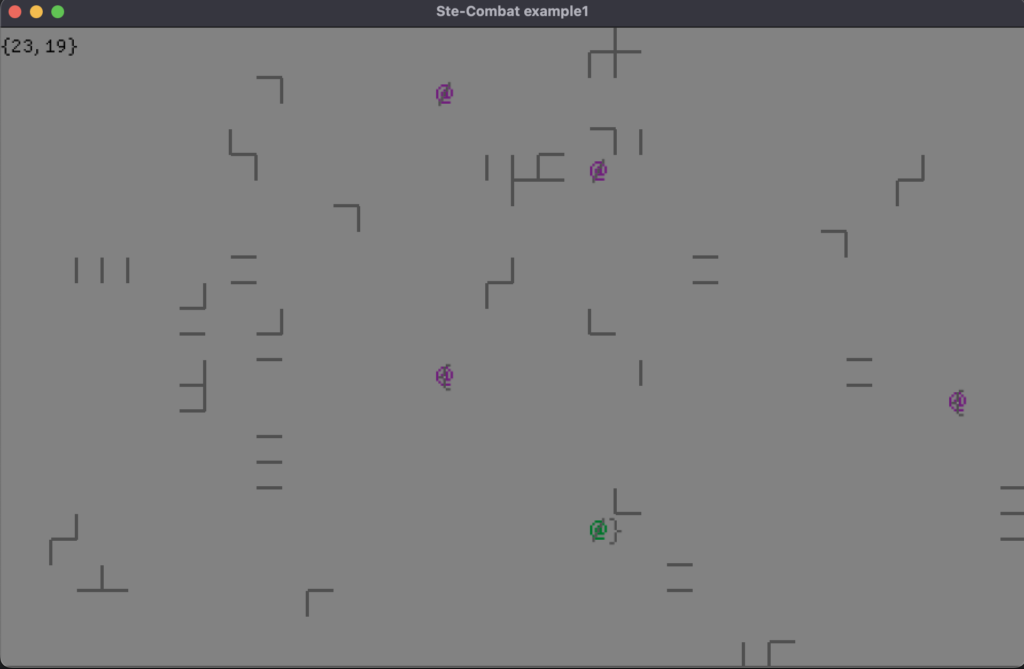
But now it’s usable in the game engine. Thanks to this, I have the map from an earlier post running in the engine. Green lines are a debug tool for actual walls, red circles are tile visibility.
I’m finally working on something that resembles a game. This something is an example for Combat crate. In Rust, again, there is an out-of-box mechanism with which you can create examples for each crate, for documentation, demonstration or learning purpose. I also use them to try out my code design for this crate.
In this crate, that depends on Thin Walls above, you actually control a character, and, tada! you have a team of enemies that can attack you with melee or ranged attacks. This crate is about creating the dumbest AI that I could think of.
It’s still blocked by the lack of pathfinding and some features in visibility on Thin Walls, but hey, I’m getting close to that.
Here is the Combat crate example. Looks a bit like LaserTag room, isn’t it?
Some of Snorri’s new animations and ArthurVista’s environment. Slightly NSFW… well, not really. We just need the naked base to start animating different clothes on top of it.


A feature that was long due, integration with Tiled editor.
It uses so called Wang tiles to mark up the walls on the map, so the editor can design not only visuals, but also a topology of the map. In future, we will expand the number of tile kinds that game engine “understands” in the map.
It’s still rough around the edges, rendering order needs to be improved, but it’s the beginning.
Temporary character credit: body/female/reptiles/red_winged.png: by Nila122, Johannes Sjölund (wulax), Stephen Challener (Redshrike) on OpenGameArt one two three.
It has a long way to go, but the engine now has:
Our next goal is buff/debuff system, which is known to be a hard problem. Probably I’m going to overengineer it, even if I try not to…
Second, shadowcasting (great job, Maria!), which will be used for:
Obstacles can have different permeability for light and projectiles. For example:
But enough words, here’s a picture of obstacle shadows and target visibility:
Just lazy about the blog.
Let me share a few new parts of our engine.
First, animation engine (by Maria) and Tiled map editor integration (by hugh):
Credits for art used:
A lot of project have devlogs. It’s motivating, it may serve your promotion, but mainly it creates some connection with people who like your project.
Legend, inspired me to continue blogging.
In the last two weeks our prototype got:
An animated GIF is worth two thousand words, so here you go – a testing map, and then the data that defines it:
As some may notice, the demo is taking a bit of inspiration in my favorite roguelike, Jupiter Hell. Go buy it. Yes, it is totally worth it. No, the price will not be lower.
Our fantastic screenwriter has finished a scenario plan and is pushing me towards a minimal combat/plot demo. He’s absolutely correct, and it means I have to finalize the essential combat features like:
And non-combat plans for the demo: